
LARP Tent & Camp: The Complete Guide to Your Home in the Game
Which tent suits you, why a new one needs a soaking before its first event — and how to sleep warm, dry and safe in camp.
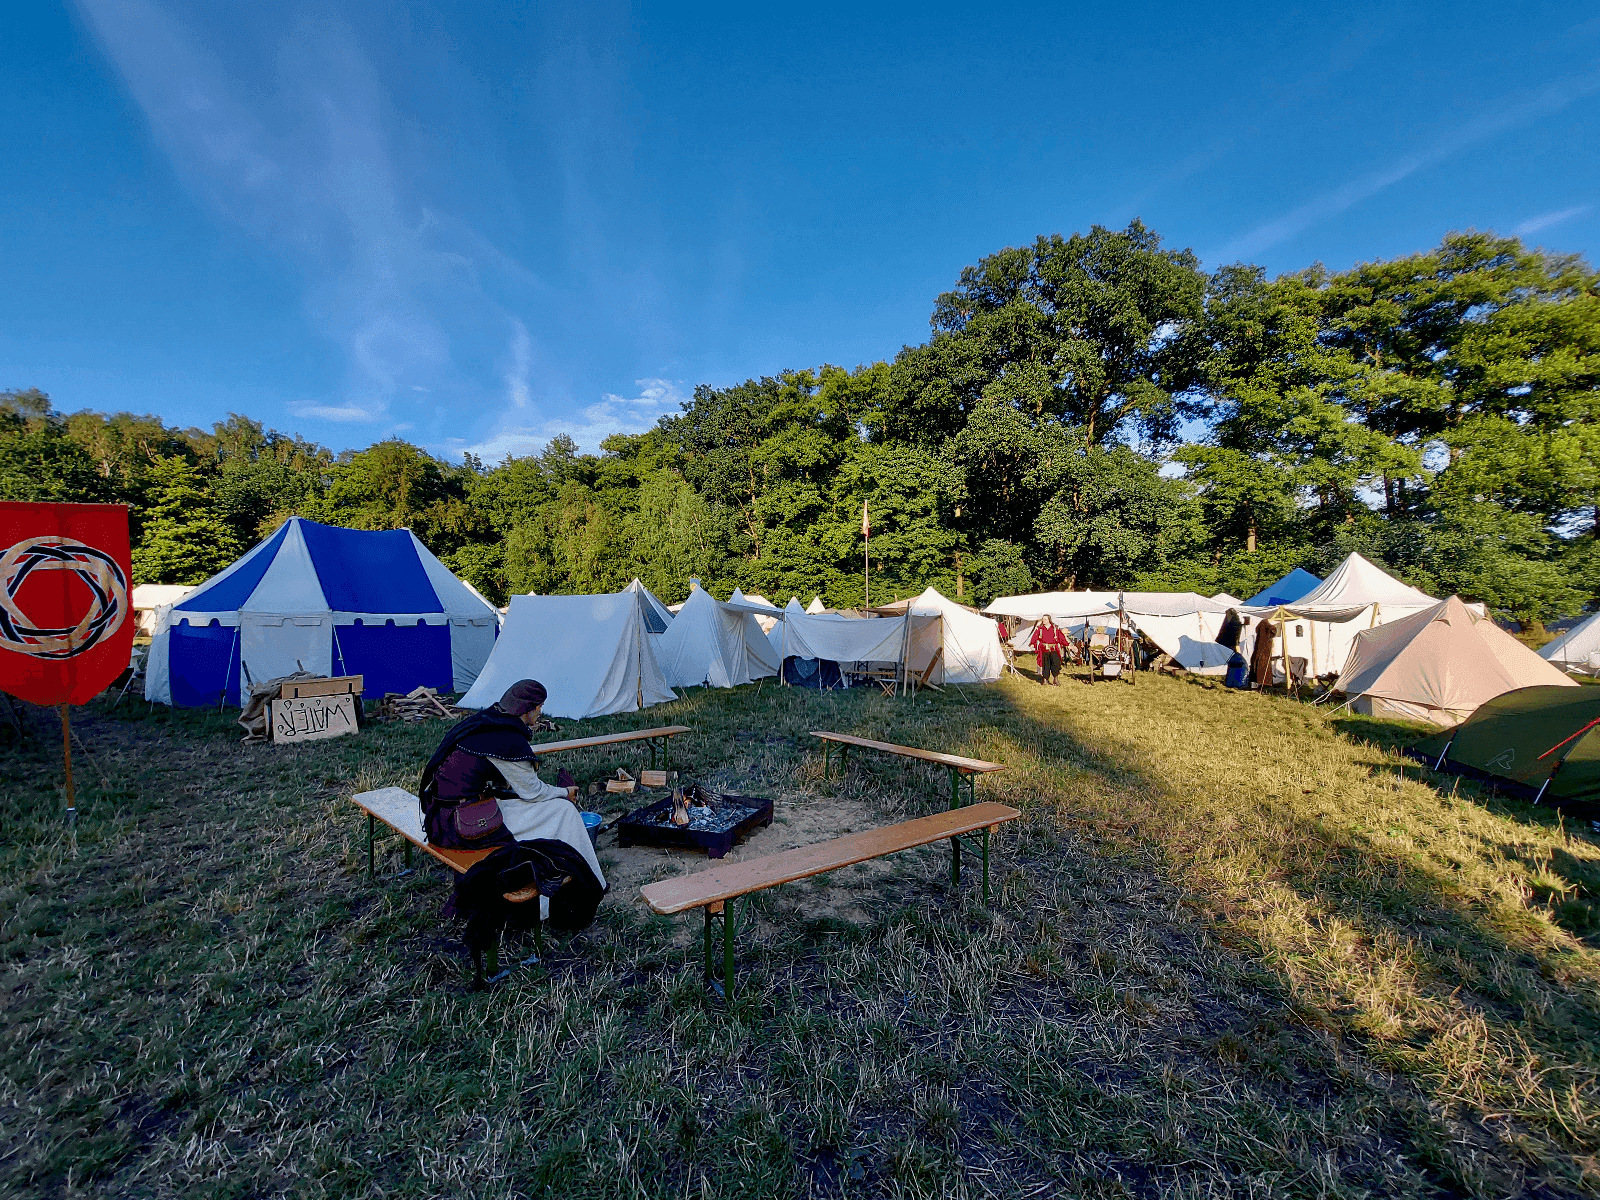
It's three in the morning. Rain drums steadily against the canvas, and somewhere at the edge of camp someone calls the watch. Inside, a lantern glows low, your cloak hangs over a chest to dry, and beside you snores a dwarf who was a stranger three days ago.
That's the moment it lands: this isn't camping. This is a home in another world.
Which is why choosing a LARP tent is one of the most important questions a newcomer faces — and one of the worst-answered. Search for it and you land in shops. We're a non-profit and we're not selling you anything, so we'll start with the sentence no retailer would write:
Don't buy a tent for your first event.
Why a tent is more than a place to sleep
The big scenes at a LARP happen in the clearing, at the castle gate, on the field. But the stories you'll still be telling in five years almost always happen in camp: the conversation by the fire after the plan fell apart. The first time someone called your character by their first name. The song someone started at two in the morning that everyone joined.
Your tent is the set for all of that. It's where your character lives — not where you sleep. That distinction shapes every decision below.
Borrow first, buy later
A good cotton tent runs from a few hundred to well over a thousand euros. That's a lot of money for a decision you'd be making before you know whether you prefer camping alone or with a group, whether your character turns out to be a mercenary or a scholar, and whether you even enjoy three nights on a sleeping mat.
So, in this order:
- First event: Ask your group or the organisers. Nearly every event has space in an existing camp — and for everything else you need to bring, see our preparation and packing guide. At Tales&Legends, "I don't have a tent yet" reliably gets you a roof.
- Second and third events: Borrow or share. Now you learn what size, what standing height and how much setup effort actually suit you.
- After that: Buy — and buy deliberately.
If you do buy, second-hand LARP tents are a serious option. Well-maintained cotton tents last decades and the used market is large. Check the seams, check the poles (especially the feet), and smell inside the folded canvas. A musty smell means mildew: vinegar or bicarbonate will often fade the stains, but rarely remove them completely — and the weakened fabric never fully recovers.
Which LARP tent suits you? The main types
A-frame tent — the entry point
The simplest shape: two uprights, a ridge, a triangular cross-section. A 3 × 2 m A-frame weighs around 6 kg, sleeps 1–2, and you can pitch it on your own in ten minutes.
Good for: A first tent of your own, solo players, mercenaries and travellers, anyone with a small car. Downside: No standing room. You get changed sitting down.
Single-mast tent (round / conical) — the all-rounder
One central pole, a round roof, usually 3.5 to 4 m across and about 2.20 m high inside. Two people live comfortably, and a pair can pitch it in about fifteen minutes.
Good for: The best compromise between space, weight and effort. If you want one tent for everything, it's usually this one. Downside: The central pole stands exactly where you want to stand.
Saxon, Viking and timber-framed wedge tents — the group tent
Rectangular footprint, solid wooden frame, often 4 × 6 m. A tent like this weighs around 26 kg and gives you about 2.50 m of ridge height. Makers rate them for 3–4 people; with chests, an armour stand and three days of luggage, two to three live in one comfortably.
Good for: Established groups, early-medieval and Viking settings, anyone who wants to play in the tent and not just sleep in it. Downside: Without two extra pairs of hands, pitching it is a test of patience.
Landsknecht and market tents — the stage
Large, tall tents with full side walls — often 4 m across with a centre height of 3.50 m, sleeping three to four. Visually, this is what most people picture when they hear "medieval tent."
Good for: Noble, merchant and faction characters; group camps that need presence; taverns and play locations. Downside: Weight, price and transport. Not a tent for anyone arriving by train.
Tarps and awnings — the underrated first purchase
A simple canvas tarp between two trees, from around 30 euros. It isn't a tent, but it turns a cluster of individual tents into a camp: covered space for a fire, a table and conversation, sheltered from sun and light rain.
If you're arriving with a borrowed tent but still want to contribute something of your own — this is it.
Cotton, poly-cotton or polyester?
Cotton is the LARP standard, running roughly 280 to 450 g/m² depending on the maker. 320 g/m² is a common figure; heavier canvas (around 425 g/m²) lasts longer but weighs noticeably more. It breathes, regulates moisture, looks right and sounds right when rain hits it. It's also heavy, slow to dry, and it will grow mould if you pack it damp.
Poly-cotton (typically 65 % polyester / 35 % cotton) is lighter, dries faster and is more forgiving. From two metres away you won't see the difference; up close you will.
Pure polyester — the classic dome tent from the outdoor shop — doesn't look right in camp, for the same reason modern clothing doesn't: the thinking is the same as for garb and kit. Not because of any rule, but because it breaks the illusion for everyone within twenty metres. That's no reason to throw it out, though: the next section shows how to dress it.
Our recommendation: Cotton if you want to keep and care for the tent for years. Poly-cotton if you travel often at short notice and have little space to dry things. Both are entirely fine — and nobody here is going to check your label.
Already own a tent? Build it a shell
Before you spend several hundred euros, there's a third option — and it's the reason you don't have to throw out your festival tent.
The Dackelgarage — German for "dachshund garage" — is a tent cover: a simple cotton A-frame pitched over the tent you already have. From the outside, what stands in camp is a canvas tent; inside it sits your dome tent — waterproof, bug-proof, up in five minutes. The trick is a division of labour: the inner tent handles the weather, the shell handles the look. Which is why not a single seam in the shell needs to be watertight.
Birk, from our community, built the first one for a Quechua MH100. Fabric, poles and tent together: around 100 euros. Weight: under 7 kg. Sewing time: one day.
→ The full build guide, with drawing, parts list and sizing table
Weathering: why your new tent needs a soaking before its first event
This is the step nearly every newcomer skips — and the reason so many first events end wet.
A new cotton tent isn't watertight at the seams. Sewing punches needle holes through the fabric. Only once the cotton fibres have been wetted do they swell, draw the weave together and close those holes. This process is called weathering (or seasoning), and it happens with water, not with time.
How to do it:
- Pitch the tent at home, somewhere it can stand for a few days.
- Soak the outer fabric thoroughly and evenly with a garden hose — roof, walls, and especially the seams.
- Let it dry completely. Completely means completely.
- Repeat once or twice.
The side benefit is worth as much as the waterproofing: you pitch your tent for the first time without time pressure, in daylight, on level ground — instead of in drizzle on a field while the organisers are calling time-in. You'll find out whether a pole is missing, whether a seam is open, and how the thing actually works.
Spend a day, save a weekend. If you take one thing from this article, take this.
On re-proofing: most LARP tents ship already proofed against water, mould and rot. That treatment fades over the years. Re-proof when water stops beading and starts soaking in — and always on a clean, dry, pitched tent.
Pitching camp: site, ground, storm-proofing
Your site decides your weekend. Before you unpack, walk the ground:
- Water runs downhill. A hollow that looks cosy in sunshine is a pond in rain. Look for slightly raised, level ground.
- Look up. Dead branches above your tent are the most serious risk in a woodland camp.
- Look down. Better to find the stones and roots now than at midnight with your hip.
- Think about the morning sun. A tent facing east is a sauna by seven.
Groundsheet: not optional. It protects the tent floor from damp below and from sharp stones. Crucially, it must not stick out beyond the edge of the tent — otherwise it collects rainwater and channels it under your tent rather than away from it.
Pegs: the ones in the box are almost always too short and too soft. Get long steel pegs. They're the cheapest component in the whole camp and the one holding your tent down at night when the wind gets up.
And the most important rule in rain: don't touch the wet canvas from the inside. Cotton stays watertight because the swollen fibres close the weave. A finger or a leaning rucksack creates a capillary bridge that wicks water through — and for as long as something rests against it, it will drip in exactly that spot.
Sleeping warm and dry — even in autumn
Cold comes mostly from below, not from the sides. Anyone shivering in October almost always has too little underneath them and too much on top.
Build from the ground up:
- Groundsheet
- A gap to the ground — wooden pallets, a camp bed, or a second thick mat
- Sleeping mat or mattress
- A warm sleeping bag
- Wool blankets, furs and your gambeson on top — they keep you warm and hide the modern sleeping bag underneath
That's the most elegant trick in camp: modern kit underneath, the Middle Ages on top. Warm and atmospheric at once, with no compromise on your health.
Against condensation, only ventilation helps. Damp breath meets cold canvas and settles. Leave the vents open even when it's cold — a slightly ventilated tent is warmer than a damp one, because wet kit stops insulating.
Safety in camp: fire, stoves and carbon monoxide
We're writing this section at more length than strictly necessary, because there is genuinely dangerous advice circulating online.
The one non-negotiable rule: never run charcoal, grills, gas stoves or patio heaters inside a closed tent — not to take the chill off, not briefly, not with the door open.
The reason is carbon monoxide. The gas is invisible, odourless and tasteless — no human sense will detect it. The German carbon monoxide prevention initiative, whose members include the German Fire Service Association (Deutscher Feuerwehrverband), states explicitly that carbon monoxide from charcoal grills and generators in enclosed spaces can be fatal even with windows and doors open. Germany's Federal Institute for Risk Assessment puts it the same way: open windows and doors offer no safety. A tent is an enclosed space. Smouldering charcoal glowing away in a metal container looks harmless and is especially treacherous, because incomplete combustion releases particularly high levels of CO.
The typical early signs — headache, nausea, dizziness, fatigue — are reliably mistaken at a LARP for exhaustion or too little sleep. That's precisely what makes it dangerous.
If you wake in a tent with a headache or nausea: wake everyone immediately, get out into the open together, leave the tent open and do not go back in. Then fetch the medics through the organisers, or call the emergency services. Work out the cause afterwards. Suspected CO poisoning needs medical assessment even if you feel better quickly in fresh air — feeling better is not the all-clear.
What does work:
- Fire outside. A fire bowl or fire pit in the open, with generous clearance from every tent wall and guy line. Cotton burns.
- Tent stoves with a flue are a genuine option, but only with a sealed chimney venting outside, a fireproof pass-through in the canvas, clearance from anything flammable, and nobody sleeping beside it. Check with the organisers first — at many events they aren't permitted. Why the flue, not the fuel, is the decisive part is covered just below.
- A CO alarm whenever anything burns in camp. Look for the EN 50291 standard; for camp use, alarms certified to EN 50291-2 (for leisure vehicles, tested for vibration, temperature and humidity) are the more robust choice. A thirty-euro alarm is the cheapest life insurance you can buy.
- A hot water bottle and hot tea. Unglamorous, entirely safe, and it has worked for centuries.
- Candles and lanterns always in enclosed lanterns, never open beside fabric, and out before you fall asleep. Warm-white LED candles are the sensible choice in sleeping tents — and look surprisingly good in a real lantern.
What about paraffin heaters?
This comes up often, and it's a fair question: a small paraffin heater seems tamer than a wood stove. No sparks, no smoke, no woodpile. In a tent it is in fact the more dangerous of the two — and that has nothing to do with the fuel and everything to do with a component that isn't there.
What matters isn't what burns, it's where the exhaust goes. A tent stove with a flue sends its combustion gases up the chimney and out. The classic paraffin heater — the type sold as "Zibro" or "Qlima" — has no flue at all. Everything it produces goes into the room: carbon monoxide, carbon dioxide, nitrogen dioxide and water vapour. That isn't a fault, it's the operating principle. These appliances are built for a room with a window, not for a tent.
The scale makes it obvious. One manufacturer specifies roughly 50 m², or 120 m³, of room for a single model. For comparison: an A-frame holds about 4 m³, a 3.5 m single-mast tent around 7 m³, a large Landsknecht tent 4 m across and 3.5 m high just under 15 m³. Even the biggest camp tent is about an eighth of what the appliance is designed for.
Then there's the water. Combustion produces water vapour, and plenty of it — on the arithmetic, roughly a litre for every litre of fuel. In a cotton tent that settles on the canvas, in your sleeping bag and in your gambeson. Even if nothing else went wrong, you'd wake up damp.
And nitrogen dioxide. Germany's Federal Environment Agency lists oil-fired room heaters explicitly as an indoor source of NO₂, and gives indoor guideline values of 350 µg/m³ over 30 minutes and 60 µg/m³ as a weekly mean. Figures you can keep an eye on in a room — not in seven cubic metres of tent.
How fast this turns is documented: in March 2020 two mountaineers died of carbon monoxide poisoning in a closed tent at the Taschachferner glacier. Post-mortem carboxyhaemoglobin levels were 48 and 59 per cent. Laboratory tests run as part of the investigation showed that a critical concentration can build in a closed tent after roughly half an hour of cooking. That was a small gas stove — not a heater running all night.
"But mine has an automatic cut-out." Tip-over switches and oxygen sensors are designed for living rooms and trigger on their own criteria — not on carbon monoxide. A tip switch won't help you if the flame starts sooting. Treat such features as a backup, never as permission.
And a point that often gets missed: "lamp oil" is not automatically paraffin heating fuel. Several different distillates are sold under that name — highly refined paraffin oil, refined kerosene, some of it scented or dyed. They differ substantially in aromatic content, sooting behaviour and smell. A heater is built for exactly one grade. The wrong fuel vaporises poorly, soots more and produces more CO. The manual decides, not the label on the shelf — and diesel never belongs in one. Refuelling, which brings a hot appliance and open fuel together next to cotton canvas, is a hazard in its own right.
What does work instead: a sealed-combustion air heater of the kind common in campervans. It runs two separate circuits — combustion air drawn from outside, exhaust vented outside, and the tent air passing only across a heat exchanger, never touching the flame. That's the same principle as the flue on a wood stove, carried through properly. Its weak points are leaks at the connections and an intake and exhaust mounted too close together. It is a proper installation with a fireproof pass-through, though, not something you carry in for the evening — and the organisers have to allow it.
The rule everything boils down to: the flue is the safety feature, not the fuel. No flue, no running it in the tent. And a CO alarm to EN 50291-2 the moment anything in camp burns at all.
One more thing that costs nothing: as a group, know where the fire extinguisher is, where the medics sit, and how to reach the nearest vehicle access. Five minutes during setup, said out loud once.
Immersion: turning a tent into a home
A technically perfect camp can still feel dead. What makes the difference is small things:
- Out-of-character kit disappears. Cool boxes, plastic crates, car keys — all inside the tent or under a tarp. Never in front of the entrance. This one habit lifts the atmosphere of an entire camp more than any decoration. One exception: gas stoves and gas canisters stay outside or under a tarp, never in a sleeping tent.
- Light is everything. Warm-white LED lanterns on tent poles and along paths. Cold white light turns a medieval camp into a car park instantly.
- A shared sign. A banner in group colours, a matching ribbon, a crest at the entrance. Costs almost nothing and turns four tents into a faction.
- A reason to come in. A fire that's lit. A pot of soup. A bench that invites you. The most open camp at any event is always where the most happens.
- The interior counts. A chest instead of a holdall, a cloth over the sleeping mat, a wooden or clay cup on the crate. Three objects are enough to make the view right when you wake up.
After the event: drying and storage
This is what decides whether your tent lasts five years or twenty-five.
A cotton tent packed away damp will grow mould. Left in the bag more than a day or two, that's near-certain — and while vinegar or bicarbonate will fade mildew stains, they rarely remove them, and the fabric stays weakened.
Realistically, your tent will be wet when you strike camp on Sunday. That's normal. What matters is what happens next: at home, as soon as possible — Monday if you can, pitch it again or spread it out — garden, garage, cellar, or across the living room if that's what it takes — and dry it completely, seams, hems and groundsheet included.
Then store it loosely and dry, not sealed in plastic. Brush off dried soil and leaves first. No washing machine, no detergent, no fabric softener — they destroy the proofing.
Your place by the fire
Your first tent is a lovely moment. But it isn't the ticket in — eventually, it's just furniture.
The ticket in is showing up.
At Tales&Legends, everyone finds a roof. If you're heading to your first event without a tent, say so. If you've just bought your first tent and have no idea how it goes up, say so. Plenty of people have stood in front of the same pile of poles before you.
And if you don't yet have an event to go to: see when we next take the field together.
See you in camp.
Frequently Asked Questions
A simple A-frame starts at a little over 200 euros; large group tents cost considerably more; elaborate Landsknecht and market tents run from the high hundreds into four figures. Tarps start around 30 euros. Note that many suppliers sell the poles separately, so add them before you compare prices. Second-hand often halves the price.
An A-frame for one or two people is around 6 kg; a 4 x 6 m Saxon tent around 26 kg. Published figures vary depending on whether poles and pegs are counted, so be generous in your transport planning.
Yes. The easiest route isn't a whole tent, though — it's a cover for the tent you already own, the Dackelgarage: around 100 euros, under 7 kg, one day of sewing, and not a single seam needs to be watertight. The full build guide, with drawing and parts list, is a separate article.
Fewer than the manufacturer says. Capacity ratings assume sleeping bags side by side, not chests, armour stands, weapons and three days of luggage. A four-person tent comfortably houses two to three at a LARP.
Not for your first event. Ask for a space in camp, or dress the tent you already own. For later events: the more visible your tent is within the play area, the more a period-appropriate one is worth it.
Not by the calendar, but by behaviour: when water stops beading and starts soaking in, it's time. With normal use, that's several years.
No. The common paraffin heaters are flueless: they release all their combustion products into the room, carbon monoxide included. They are built for a room with a window, not for a tent. What matters is not the fuel but the flue — without a chimney or a sealed combustion chamber, no heater belongs in a tent.
Nils Jäkel has organized summer-theater events for five years and has attended LARP events for the same span; for four years he has also been a camp organizer at one of the largest camps at Conquest of Mythodea, the world's largest LARP event. He spent four years chairing a theater association's board, and for the past two years has served as board chair of the State Association for Amateur Theater Saxony (Landesverband für Amateurtheater Sachsen).
A regular letter from our world: news on events, contributions, and lore — sent straight from Avarra to your inbox.